
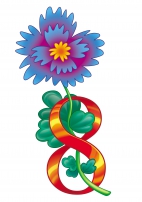
Stylish crafts for March 8. Salt dough heart magnet

It is so customary that a postcard is attached to any gift, in which the most pleasant words and wishes are written. If the postcard is beautifully made, then such a work will not be ashamed to be placed on the desktop of even the most conservative organization.
Even the smallest child can make the simplest postcard. Most often, such a children's gift is made using an application or coloring.

A beautiful and unusual postcard can be made using voluminous flowers from paper or ribbons, plasticine or paper spirals, dried flowers and small bows. With the help of figured hole punches, a postcard can be given an airy look.

A large postcard in which each family member can write the most pleasant wishes will be a good gift. And you can also make a whole congratulatory album by combining all the sheets with congratulations and beautiful postcards, applications, drawings. The cover of such an unusual album can be thick cardboard or a piece of wallpaper, but it will first need to be straightened. A beautiful decoration will be a pattern of coffee beans or rhinestones, beads, ribbons.

Modern home computer tools allow you to make unusual video cards or cute presentations, in which even distant relatives and friends can take part.

Flowers
A beautiful bouquet will always please mom or grandmother. But a chic composition will quickly wither, and the cost of a large work of floral art is impressive.
Therefore, very often children make an original bouquet with their own hands.

For this you can use:
- plasticine and chopped woolen threads (you get a sprig of mimosa or a pretty little willow);
- plain paper (you will get flat daisies and bright gerberas);
- several layers of plain paper (you will get fluffy asters and dahlias);
- corrugated paper (usually elegant roses are made from it);
- plastic bottles (with the help of fire they will turn into lovely hyacinths and irises).
And the flower can also be crocheted, molded from plasticine or from salt dough.

Topiary will be an unusual gift. Usually such a craft is made from a balloon wrapped in threads. But you can take a fairly thick wire and make a pretty tree in the form of a heart or figure eight. Flowers or butterflies, ribbons and beads are used to decorate the crown. The trunk of a topiary can be a wire, a branch of a real tree, an ice cream stick or a straw for a cocktail.

Candy stand
This idea is not new, however, such a craft will be very pleasant for mom. After all, it combines flowers and sweets.

To make crafts, petals are made from corrugated paper, slightly squeezing and then straightening them along the diameter of the candy. The candy itself is attached with tape to a culinary skewer or toothpick, the petals are tightly wound with threads. Skewers can be wrapped with green tape and decorated with plasticine or colored paper petals.

The resulting flowers will take their rightful place in the vase. And they can also fill a box or basket, the body of a toy car. Mom will be pleased with such an unusual surprise.

From sweets on skewers, you can create a pineapple, a skirt for a doll, a bunch of grapes and many more unusual and attractive crafts.

Packaging
Even in a purchased gift, you can put a piece of your soul if you arrange it beautifully. To do this, they make gift boxes made of cardboard, fabric bags (any fabric is used from the most delicate organza to burlap), wicker baskets or newspaper tubes. The latest creation can be further used for purely practical purposes. A master class on creating such containers is easy to find on the Internet. There are step-by-step instructions for creating lovely baskets.

For jewelry, you can make a box of woolen threads, toothpicks and thick cardboard with your own hands. The same cute little thing can be presented to a friend.

Volumetric letters
Initials and words of love can be made from large three-dimensional letters, which are filled with artificial flowers and beautifully decorate any room. It is easy and simple to make them out of cardboard, you just need to find or come up with a high-quality drawing.

edible gifts
This category includes all sorts of goodies, ranging from the unusual shape of sandwiches and ending with a homemade cake. Even the simplest recipe will help create a festive mood. Some of the goodies can be made very quickly even without baking.

And festive cookies can be laid on paper with written wishes or a beautiful openwork napkin cut out in the manner of a snowflake.

An excellent decoration of the festive table will be a bottle of champagne, decorated in the form of a doll with a kitchen napkin skirt with a small hat on a cork. For decoration, you can use artificial flowers, a necklace of small beads or beads.

Useful gifts
Such gifts for the home and garden include shelves, cutting boards, various planters. And you can also make a funny weed from an unnecessary sock, earth and grass seeds.

A beautiful photo frame will turn out from two sheets of cardboard and your favorite photo. The frame is decorated with various decorative elements.

Knitted things will be a wonderful gift. It can be a fluffy scarf, warm homemade socks, a rug made of terry towels.

As a surprise, embroidered napkins or towels, unusual dummies covered with old jeans or shirts can act. Even a T-shirt can serve as a pillowcase.
For those who like to create with their own hands, a needle bed or a basket for needlework will come in handy.

Home cooks will be delighted with oven mitts, hot coasters made from clothespins or wine corks, spice jars made from baby food jars and beautifully decorated with beads, rhinestones, coarse salt.

In general, gifts for March 8 can be very diverse. It is enough to carefully look at what mom likes to do and what she can use in these activities.
The most beautiful, blooming spring holiday - March 8 - is very close! He is a harbinger of spring, beauty and sunny days. On this day, everything blooms and smells. The first spring flowers are blooming - snowdrops, birds are flying in, everything in the area comes to life. On this holiday, all women, girls and girls are waiting for something special. So how to congratulate your beloved mom, granny, nephew, girlfriend, sister?
Of course, the best gift made with your own hands. In this article you will see a lot of craft ideas for March 8th.

DIY materials
So from what you can make crafts for the eighth of March:
- Colored paper or thick cardboard.
- Pasta.
- Plastic spoons (bottles).
- Beads.
- Candies.
- Plasticine.
- Salty dough.

- "Blossoming Lily"
- "Flower for Mom"
- Spoon snowdrops.
- Paper rose.
- Unusual chamomile.
- Flower of cotton buds.
- Magnet - a heart made of salt dough.
Check out the modern home decor on this site https://masterinterera.ru/decor

"Blossoming Lily"
You will need:
- Colored cardboard (green).
- The paper is white.
- Scissors.
- Heart templates (you can draw by hand).


Manufacturing progress:
Take a heart template, cut it out on green paper. Cut out lily flower template. From yellow colored paper, cut out the middle of the lily. Glue the flower to the heart. Attach the yellow center to the flower. Blooming lily is ready!

"Flower for Mom"
We will take:
- Black pencil.
- Thick cardboard.
- Corrugated paper.
- Large flower stencil.

Progress:
We outline the stencil on cardboard. We roll balls from corrugated paper. Dip the resulting balls in glue and glue them on the flower. The flower is ready!

Snowdrops from spoons
To craft these beautiful spring flowers, we need:
- Plasticine mass (green and yellow shades).
- Plastic spoons.
- Already old, unnecessary plasticine.
- Cocktail pipes (green).
- Green bottle.
- Napkins (green).
- Flower pot.


Instructions for making crafts:
We twist the ball from unsuitable plasticine, and lay it on the bottom of the pot. Roll 7 carrots from green plasticine and do the same with yellow plasticine. Attach a yellow carrot tightly to the tube. We carry out such actions with all seven cocktail tubes.

Cut off the handles of the plastic spoons. We insert three petals into each tube. From the green bottle we cut out the leaves of our snowdrops. We alternately attach the snowdrops to the plasticine located in our pot. We also attach the leaves.

We put green napkins in a flower pot to simulate grass. Here are the wonderful snowdrops ready, it remains to give them to your mother or grandmother.

Rose
To form a flower you will need:
- Double-sided paper in different colors.
- Corrugated green paper.
- Wire (preferably aluminum).
- Scissors.

Instruction:

- From multi-colored paper of red shades of color, cut out a circle. Draw a spiral in the resulting circle.
- We cut carefully in a spiral, we try as evenly as possible. We twist the spiral.
- We glue the resulting structure. Let's dry. From green colored paper, cut out leaves for a rose.
- Glue the flower bud to the leaves. We wrap the wire with green paper. We fix the bud to its base with glue.


Chamomile from cotton pads
You need:
- Cotton discs.
- Threads for sewing white.
- Acrylic paint.
- plastic mass.
- Durable multi-colored cardboard.
- Multi-colored paper (any color).

Manufacturing process:
First we make the petals of our chamomile, for this we twist the cotton pads with the edges up. So we make 8-9 petals. We connect the petals with a thread.

For the core of the flower, take a disk and dip it in yellow paint. Let's dry. We smear the middle with glue and form a flower. Let's make a stalk from green paper and 3-4 sheets per stalk. We form a flower. Chamomile is ready.

Chamomile
For a fake, we will take:
- Cotton sticks.
- Plasticine mass for modeling (yellow).
- Felt pens or markers.
- Scissors.
- Colored cardboard.

Instruction:

We take a leaf of colorful cardboard, absolutely any color that your soul desires, this will be our basis. Now you need to cut the sticks into two parts, scissors will help us with this.

From plasticine we make the middle of our inflorescence. We roll a plasticine ball. In the resulting ball we insert cotton swabs in a circle.

We stick the resulting flower to thick cardboard. Draw the stem and leaves with markers. If you wish, you can add pleasant words of congratulations.

Salt dough heart magnet
We will need:
- Corn flour.
- Salty dough.
- PVA glue.
- Magnet.

Manufacturing process:
First, prepare the salt dough. To do this, we take 300 g of ordinary wheat flour and 150 g of salt, so that the dough smells, you can take sea salt with some kind of smell. Add water and any food coloring. Mix well.

Roll out the dough and use a cookie cutter to shape it into a heart shape. Let's dry our heart.

The dried heart from the heart must be smeared with glue and decorated with cornmeal on top. Spread glue on the other side of the heart and attach a magnet. You can add beads if you like.

Finally
Every girl, girl, woman, grandmother will be pleased to receive a gift on this gentle spring holiday. And it's even nicer if this gift is made with your own hands. Therefore, do not be lazy and take some time to make a gift and give it to your beloved women. By the way, you can show off the photos of crafts you donated on March 8 to your friends.

Photo crafts for March 8


The task of all men is to provide their women with attention on March 8. If a husband or loved one can buy a present, then sons can make their own beautiful gift on their own from under manual means. The most beautiful do-it-yourself crafts are made very simply and take little time.
Such works have become traditional in schools and kindergartens. The most popular gift material for mom is colored paper. From it it is most convenient to make a pleasant surprise for a spring day.
Every child wants to surprise his mother, especially on such a spring day. For the holiday in schools, children make various crafts. Anything can be used as a material. In the second grade, children can be invited to make figures from clay, and then color them. Mothers and grandmothers will put such toys as a souvenir on the shelf or attach them to the refrigerator (magnet).

Crafts from colored paper
Option number 1
You can create a very beautiful craft from colored paper. It is suitable for elementary school children. It is done quickly, and it turns out very beautifully.
To create a craft you will need:
Colored paper (green, red, white and yellow);
PVA glue;
scissors;
purple marker;
simple pencil.
Creating a masterpiece:
First lay out all the tools and materials in front of you. Let's do the weed first. Take a whole sheet of green paper. Now, from any edge, start folding into an accordion. You can start from the top or bottom, as you like. Make sure that each fold is the same size. When you reach the end, connect the cones to make a fan.
Now will make tulips. Draw the simplest tulip on red colored paper and cut it out. Fold the red paper four times to make 6 more flowers. Attach the tulip to the paper and circle with a simple pencil. Cut out carefully. The result should be 7 tulips.

Next, cut out daisies from white paper. We do the same principle as tulips. Only in addition to flowers, we also cut out the middle of yellow paper. We also make 7 flowers. We attach the middle to each chamomile with glue.
It remains to collect our composition. At the ends of the fan, alternating with an accordion, glue tulips. And scatter daisies in the center and also glue. Our craft is ready!
Option number 2
Also, children in the first grade can easily make origami flowers. Since Women's Day is celebrated in the spring, you can make a bouquet of tulips. These will stand for a long time, and please the mother's eye.
Colored paper (5 sheets of red and 5 sheets of green);
scissors.
Progress:
We start creating a festive bouquet from a bud. Take a sheet of red colored paper and put it in front of you. Grasp the upper right corner and bend the sheet diagonally to the end. Draw a line and cut. The result should be a square and a wide strip.
Bend the square diagonally, then straighten it. Take the upper left corner and also bend diagonally, then unbend again. Now wrap yourself around so that both fingers on the right hand hold one diagonal, and the left hand holds the opposite. Fold the square into a triangle.
Now take the left corner of the first triangle and flip it over to the right. Then turn the piece over. Now there are 3 corners on one side, and 1 on the other. Where there are 3, turn one corner to the opposite side.

Look carefully. A hole should form at one end, and 4 petals at the other. Blow into the hole, as if you were inflating balloons. Then unfold the tips of the petals.
Take a sheet of green paper and cut out a strip the same size as the one left from the red paper. Then wrap it lengthwise into a thin tube. Here is our stem ready. It remains only to stick it into the hole on the bud. Thus, you need to make the rest of the flowers. The result should be 5 tulips. You can experiment with flowers and make tulips of different colors (yellow, red, orange).
Option number 3
By March 8, mimosa is usually given to all women. From these yellow flowers not only the mood is lifted, but also a magnificent aroma emanates. Such flowers can be made by hand. They will delight mom and grandmother for a whole year.
Necessary tools and materials:
Colored paper (green and pink);
simple yellow napkins;
PVA glue;
simple pencil;
ruler;
paints;
scissors;
disposable cup.
Progress:
Let's start making the stem. Cut a long strip of green paper. Then twist the thin tube. Spread the ends with glue and wait until they dry. If glue is not at hand, use a stapler.
Let's start making flowers. Mimosa flowers resemble fluffy balls. Take yellow napkins and cut into 3 cm strips. Fold each strip in half. Next, make cuts along the entire length, and roll up.
The opposite side should be fluffy. Make many of these balls. Count at the end. It is necessary that the number of flowers be odd. Then glue the fluffy balls to the stem. You can install them tightly to each other, in small piles.

But we get just a bare stem with flowers, so you need to attach the leaves. Cut out two long ovals from green paper. Fold in half and make cuts. Spread the leaves, and apply glue to one end and attach to the stem.
Original beadwork
By March 8, boys in elementary grades for mothers and grandmothers can make handicrafts from colored paper, and girls from beads. Now we will show several ways to create a souvenir.
Small bouquet of flowers
Even a first-grader will cope with such a craft. But basically, only from the 3rd grade they begin to teach beadwork. There is nothing complicated in this technique, the main thing is not to rush.
Required materials and tools:
Round beads (pink, green and purple);
wire (not thick, so that it can double pass into the beads);
yellow beads;
small, decorative vase.
Progress:
First we make the buds. Each flower will consist of 5 identical petals. Take a piece of wire, about 10 cm. Insert one pink bead into one end. Wrap with the other end and stick the end into the hole, but on the other side. This way you will fix the beads. Now string two pieces, and with the other end go through them. Then do the same with three pieces.
The result should be a small pyramid. You should also do up to 5 beads, then go down. That is, first: 1, 2, 3, 4, 5; and then: 5, 4, 3, 2, 1. At the end, twist the two ends of the wire along the entire length.

By the same principle, you make the rest of the petals. We need 10 pink and 15 purple petals. By the way, the leaves are made in the same way as the petals, but from green beads. It is not difficult to calculate, we need 10 leaves.
For the centers, take a 10 cm wire and fix the bead. There should be 5 centers in total.
The next step is to collect our bouquet. Take 5 petals, and lay the middle in the center, twist everything. Take two leaves and also twist around the stem. Then straighten everything. Also fold all the flowers. Insert the finished bouquet into a vase or tie it with a beautiful ribbon. This is how easy it is to make small souvenirs. To add a spring mood, all the petals can be made multi-colored.

Salt dough art
Souvenirs made from salt dough will be a wonderful surprise for mom or grandmother. This is a safe method, since piercing and cutting tools are not required here. In order for you to get beautiful figures and not fall apart, you need to properly prepare the salty composition. First, we will describe the recipe for salt dough, and then we will describe the workflow.
Required Ingredients:
Wheat flour;
fine salt;
water.
Preparing the dough:
Take flour and salt in the same amount and mix. Add some water and knead the dough. Then it must be put in a bag and placed in the refrigerator for a couple of hours. After that, you can safely start sculpting. If it seems to you that the dough is completely inelastic, add a little cream. This will be useful for hands, and it is more convenient to sculpt figures.

For a souvenir:
Ready salted dough;
gouache paints;
tassel;
water;
magnet.
Progress:
Now it's up to your imagination. You can make small flowers in a basket. First, sculpt a round basket and attach a handle. Inside you place 7 or 9 small flowers, like chamomile, but with 5 petals. Leaves may stick out on the sides.
When everything is ready, you need to wait for the dough to dry out and become stone. Then dip your brush in water and start painting. The basket can be made brown, the flowers pink, and the centers yellow. Accordingly, the leaves turn green. You can sprinkle glitter on top.
Our advice to you! Do not soak the brush in water too much, otherwise the paint will drain and the whole craft will deteriorate. Then, when the figure dries, you will need to glue a magnet on the back. Here is such an original souvenir you can make by March 8 for mothers and grandmothers.

All children want to surprise their mothers on this wonderful spring day. They come up with various souvenirs with their own hands. Toddlers can make gifts out of colored paper, while older kids do serious things. In general, crafts can be made from anything. You can sew a pillow and embroider an image of your mother on it. It is enough to take the photo on a flash drive to the photo salon, and they will transfer the image to paper.
You can use simpler advice, especially if you do not have time. Make a postcard out of cardboard by folding the sheet in half. Then cut out the big eight and glue it to the postcard. Glue flowers around the entire perimeter of the number. Inside you can write beautiful wishes for mom.
Such gifts are always appreciated as they are handmade. When preparing them, your soul was invested. Turn on your imagination and surprise mothers and grandmothers with your surprises on this magnificent International Women's Day.
We will repeat again: a gift that you make with your own hands will be priceless for a loved one. After all, at least you put the warmth of your hands and a small piece of your soul into it. And even though there are a million ready-made surprises for sale in stores today, we offer to make your mother, grandmother or sister really pleased. You have probably already appreciated our ideas for making chic postcards with your own hands. Now let's get to the giveaway!
- several coffee filters;
- some flower wire;
- small pliers;
- high quality watercolor.
On a note! Not everyone has coffee filters, which means you need to know how to replace them. Beautiful crafts for March 8 are also made from corrugated paper (or any other thin paper). The shape is more important here: the paper should be round.

- So, if you are using coffee filters, then prepare four to eight of them. In this case, you get one flower. The splendor of our flower depends on the number of sheets of paper or filters.
- We put all the filters or sheets of paper in a pile and bend in half, then again, and again.
- Now you need to cut off the edges so that the future petals take shape. Use a wavy shape or experiment with different patterns.
- Now half of the filters need to be set aside, and the other part should be cut a little more (by four to five centimeters). If there are fewer filters in the center of our future flower, then it will look more realistic.
- Now put all the filters unfolded on the table. Small parts should lie on large ones (as in the photo below). Now we draw a wire through the center of all the blanks, bend it and pierce the paper again. The distance between the two holes should be at least five millimeters. To secure the wire, twist it around the back of the flower.
- Now squeeze the paper and lift it up, without stopping twisting a little. This should be done with every filter. See how it's done in our photo tutorial. Now the base of our bud needs to be wrapped with wire.
- Now, with the help of green adhesive tape, the flower must be wrapped, starting from the bud and ending with the tip of the wire. It is desirable to give filters a pleasant shade. Coloring them is easy: use watercolor, which can be diluted with water, then the colors will turn out to be more delicate. You can use not one color, but several at once. Ready! This is how quickly and simply unique beautiful crafts for March 8 are created with your own hands.


You will need:
- several sheets of thin colored paper (can be replaced with corrugated paper);
- some wire; sharp scissors.

- From the paper of the chosen color, you need to cut circles. There should be three of them, use different tones. The diameter of the part should be an average of six centimeters.
- Now we take the wire. You need to cut off a piece and bend it in the shape of a circle (as in the photo below). The length of the wire should be about twenty centimeters.
- Now take yellow paper and cut out a couple of small circles. They need to be glued to the lower and upper parts of our bud.
- All the circles now need to be folded and in their middle make a small hole through which you can pass the wire. As for the crown of the flower, a small loop can be made from the tip of the wire there. Our stylish flower is ready! Such crafts in the form of flowers on March 8 will perfectly decorate the festive table, so do several at once.


You will need:
- sharp scissors;
- green adhesive tape;
- several skewers;
- glue;
- several old magazines.

- For work, not all pages of magazines are suitable for us, but only the most colorful and bright ones. Pull them out and fold them in half. Then we turn all the halves to the fold in the center, as in the photo below.
- On the side where the folds, carefully cut the fringe. There should be at least one centimeter to the base.
- The paper blank is wrapped around our skewer, as a result we should get a bud. Now, with the help of adhesive tape, the bud needs to be fixed at the base. The green ribbon is used to turn the skewer into a stem.
- We dissolve the fringe so that our bud is as lush as possible. Giving one such flower is cute, but the bouquet will look much more spectacular. Crafts for March 8 mom do it yourself!


Original do-it-yourself craft: we make a rose in a waffle cone
You will need:
- a few waffle cones (you can buy them at any point where they sell ice cream);
- stationery knife;
- a little hot glue (you can also use standard PVA glue);
- sharp scissors; a couple of sheets of colored paper.

- We take colored paper, from which we need to cut a quarter of a circle. With this blank, we wrap our waffle cone. The ends are carefully fixed with glue.
- Now, using colored paper, we make a rose of a suitable size. However, not necessarily a rose - be guided by your taste. As for the rose, it is done simply: we take paper, cut out a couple of types of petals. Note that the petals should be in the shape of a quarter circle or heart. We glue them all together (see instructions below).
- Around the skewer glue the petals in a checkerboard pattern. Now add a little glue to the edge of the cone, attach the bud.
- Now you will need green colored paper. Carefully cut out the leaves and use glue to attach them to the cone. By the way, it is not necessary to make a flower with your own hands, you can use beautiful natural or artificial flowers.


You will need:
- several sheets of thick cardboard (thickness should be about three millimeters);
- a few thinner cardboard - about two millimeters;
- glue (you can use hot glue or the standard Moment, the main thing is that it holds very well);
- a tube of PVA glue;
- sharp clerical knife;
- some masking tape; brush for glue;
- a couple of pieces of fabric. Choose the colors of your choice, however, for the top, we recommend using a dark fabric with a floral print, and for the decoration inside the box - a light fabric in delicate shades.
- scissors;
- stack
- white paper (one sheet).

- So, first we need to cut the blanks. For this we use a clerical knife. We indicated all the necessary sizes in the photo below. If you have no desire to make the base of the box with your own hands, then just buy a ready-made box. It is only important that it be made of durable cardboard.
- If you are working on our blanks, we assemble the cover and walls of the future product and carefully glue it with glue (as in the photo). The corners inside and outside for strength should be pasted over with masking tape.
- Let's get to work with the fabric. To decorate the walls of the box, you need a piece measuring approximately 46 by 9 centimeters. As for the lid, cut out a piece measuring 21 by 26 centimeters.
- We glue the box with pieces of fabric. To do this, you need to smear the lid with glue (now PVA) and attach a cloth. Take a look at the photo, how to properly arrange the corners so that it looks aesthetically pleasing. The corners are aligned with the help of stacks.
- We can proceed to the design of the side details. The corners need to be turned inward. If there is too much fabric, feel free to cut off the excess.
- To decorate the cover, you also need to grease it with glue, attach a cloth and carefully glue the corners.
- White paper is cut out the same size as the bottom of our box. A piece of light fabric should also be the same size. The corners are cut, everything is neatly glued. At the bottom we glue the workpiece with paper down. You can align all this with a stack. By the same principle, we work with the edges of the lid and side walls. The box is ready! Of course, this is much more difficult than, for example, crafts from napkins on March 8th. However, the one to whom such a present will be presented will definitely be delighted. And it's worth the effort! And finally: if you wish, decorate the lid of the box with beautiful rhinestones or large beads. Large pearls will look especially elegant.


You will need:
- several standard nails;
- thick thread;
- your joint photos with your mother;
- paper clips or stylish clothespins;
- simple pencil.

- First you need to carefully mark the places where the nails will be hammered. We advise you to first mark on a piece of paper a diagram of how the threads and nails will be located. It is much easier and faster to cook crafts if you also indicate the direction in which you will wind the threads with arrows.
- Now carefully drive in the cloves and wind the thread around them. The color of the thread is best chosen based on the tone of your walls. If the walls are light, then the thread should be as dark as possible, but if the walls are dark, then choose a lighter thread. In general, play on the contrast: our handmade gift should stand out as much as possible. As for nails, it is better to take smaller and thinner options: they will not be so noticeable. It is not necessary that the thread be of the same color - our original wall frame can be multi-colored.
- Print the cutest and most beautiful family photos featuring mom. The size of the photo should not be very large, be guided by the size of the frame. You can attach them to the threads using decorative clothespins - these are often sold in shops with souvenirs and all sorts of little things to decorate gifts. Ready! Everything ingenious is simple.


Do-it-yourself postcard for March 8: we make an original drawing A super-simple idea that even a child can handle (probably easier, only crafts from the test for March 8). Your own postcard print is created almost instantly - rate it.
You will need:
- one head of simple cabbage (can be replaced with Beijing cabbage);
- a small piece of foam rubber; paint of the chosen color (it is better to choose more juicy tones: red, orange, blue, burgundy);
- sharp knife;
- rag or piece of paper.

- So, part of the cabbage is cut off with a knife.
- Now we take the foam rubber and thoroughly soak it with the paint of the selected color.
- The cut cabbage is dipped in foam rubber and tightly fixed in the form of a seal (see photo below). Now you can create any original postcard!


A lot of original DIY crafts and postcards for March 8 for mothers and grandmothers can be found in this section, where fellow educators share their ideas and clearly show the results. Make sure that other handmade souvenirs for moms can be very bright, original and varied.
Contained in sections:
Includes sections:
By groups:
Showing publications 1-10 of 2902 .
All sections | Crafts for March 8. Gifts for moms
Tasks: to arouse children's interest in spring flowers, in creating gift for mom; to form the ability to compose a composition of a vase and flowers from individual elements, to convey the features of the appearance of a plant. To form an interest in the application, develop a sense of shape and color;...
 Author: Baeva Olga Nikolaevna, Puzyreva Daria Nikolaevna Master class "Making a fan for 8 Martha" for moms These are wonderful gifts for moms, in the form of fans, decided to make for International Women's Day - 8 Martha. The guys made the fans themselves, except for the moment when ...
Crafts for March 8. Gifts for moms - Master class. 3D postcard for your beloved mother
Publication “Master class. 3D postcard for your beloved...»  Good afternoon friends. I want to share with you a master class 3D card for my beloved mother. If you like to create paper flowers with your own hands, then go to my master class. The idea can be brought to life together with children and please our mothers and grandmothers on the occasion of the eighth of March...
 MAAM Pictures Library
Application from ready-made forms "Gift for Mom" Application Topic: “Gift for Mom” Purpose: making a composition from ready-made forms. Tasks: to teach children to compose a composition from ready-made forms according to the model; develop the ability to work independently, repeat a certain sequence in a pattern; develop eye, fine motor skills ...
 The work is done on whatman paper with gouache paints with the addition of appliqué. A vase was painted with paints, the flowers were printed, they were pasted by the children themselves, with love for their mothers, grandmothers, sisters. This work was prepared for the holiday, which is dedicated to the "International...
 Author: Chaptykova Irina Vasilievna Topic: “Postcard to my beloved mother” Purpose: creation of a social situation of development in the process of studying the volumetric application “Postcard to my beloved mother” Tasks: to create conditions for the development of the ability to perform work according to the model, using strips of color ...
Crafts for March 8. Gifts for Moms - Summary of the application lesson in the second junior group "Postcard for Mom"
 Purpose: To form the ability of children to pre-lay out finished parts in a certain sequence on a sheet and carefully stick them. Develop the ability to decorate a postcard with ready-made details. To teach children to carefully smear and glue flowers, correctly positioning them ...
 Master class "Postcard for mom" I propose to make such a gift for mom, grandmother, sister. You can print any inscription and congratulations and stick it on a postcard. 1. You need to prepare cardboard templates. 2. Draw patterns on colored paper with a pencil. Two leaf templates...
 Author: Glebova Evgenia Vladimirovna Topic: GCD application “Postcard to Mom on March 8” Purpose: creation of a social situation of development in the process of application “Postcard to Mom on March 8” Tasks: Creation of a creative atmosphere, festive and high spirits; keep educating...
Synopsis of the OOD for the application "Postcard for Mom" in the preparatory group Program content: - to consolidate the ability of children to cut out several symmetrical objects from paper folded with an accordion. - develop visual control over the movement of the hand, coordination of movements. - consolidate children's knowledge of spring flowers - develop compositional skills -...
A woman likes to receive flowers. However, most often this happens on a birthday and on the eighth of March. Especially lucky women are lucky on their wedding anniversary. Moreover, the lucky woman must first and in advance remind herself of the surprise, write down the place of its purchase and the exact cost of the bouquet, then there will definitely be an unexpected gift.
Everything is easier with children. The function of reminding and making a gift is taken over by caring teachers. There is no need to invent anything here. For example, mimosa and napkin roses look alive and look very sweet and gentle. In addition, so that the next souvenir for your beloved mother does not gather dust on a shelf or in a drawer, you can make a photo frame from salt dough. The material for the manufacture is absolutely safe, and the resulting result is very useful for home use.
A great idea for making postcards in the younger group is a flower from the palms. Surely every mother painstakingly circled the pen of her child in notebooks and signed the date. And here are three sketches - the red palm at the top of the sheet is a bud, and the other two on the sides are the original petals. The postcard is very touching and original.
Related publications
-
 Fur leggings - we sew the hit of the season
Gaiters - stockings covering the shin from the ankle joint to the popliteal cavity. This is not only a modern and stylish product. They...
-
 Shugaring at home How to cook a dense paste for shugaring
Sugaring (hair removal with caramel paste) is a popular hair removal method. There are many ways to make shugaring paste at home. Thanks to...